TLDR
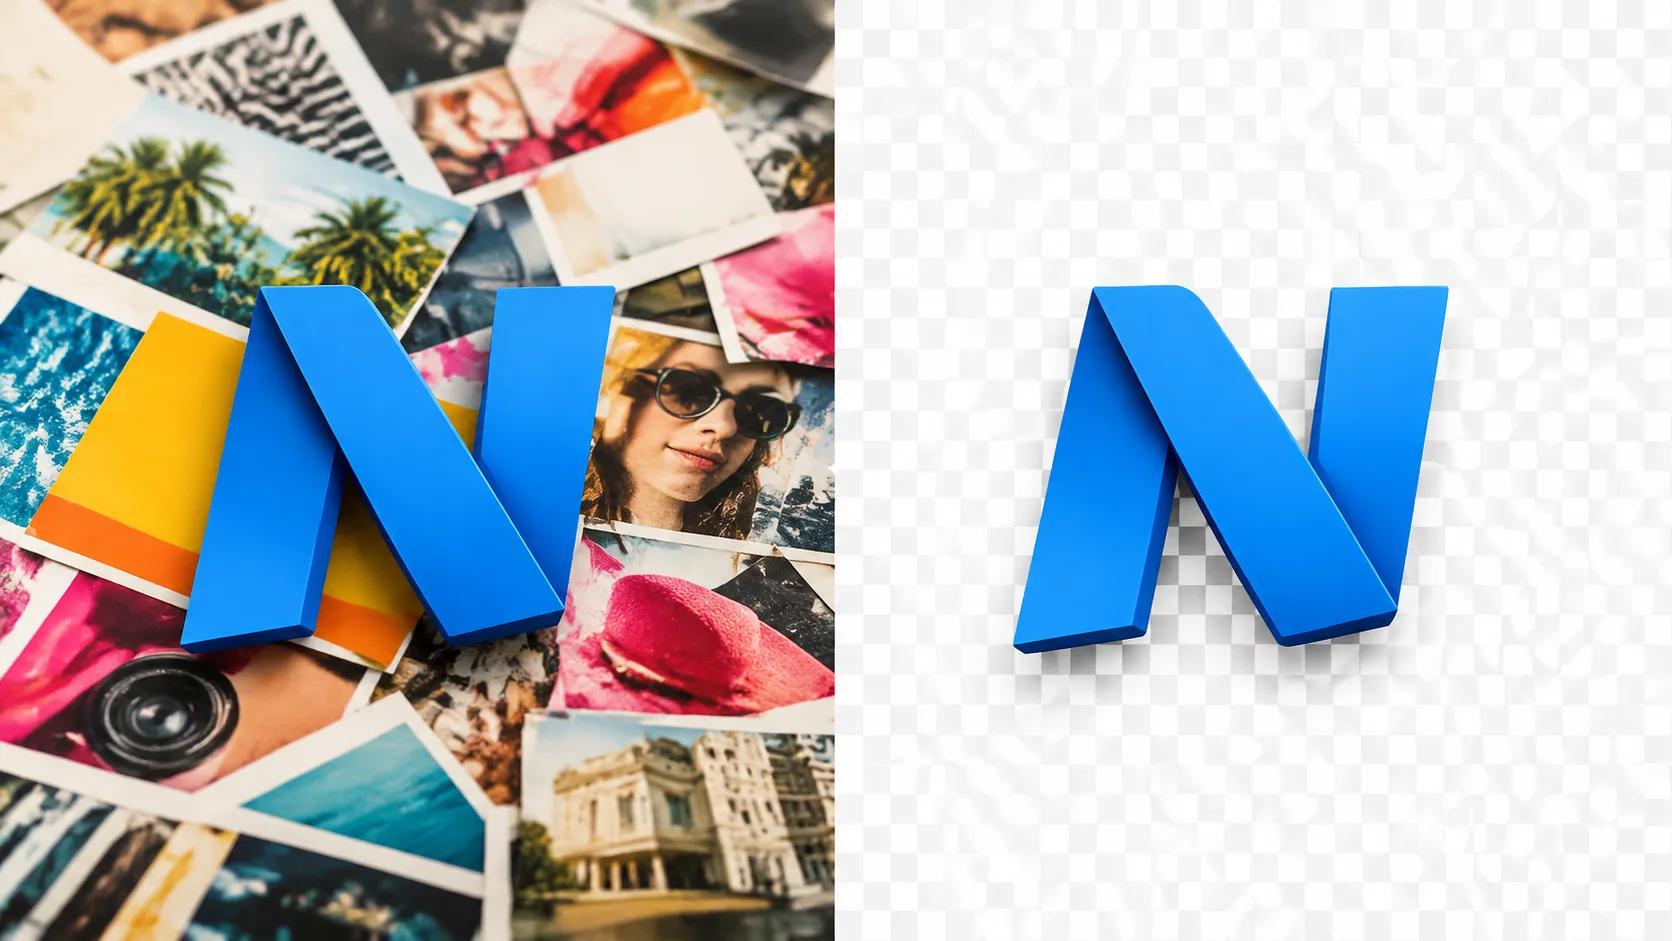
- Job = isolate an existing mark: wordmark, icon, monogram, or badge—clear the backdrop so you can place it on any layout.
- Use the logo tool when the subject is a brand mark; use the general background remover for people, products, and everyday photos.
- QA is edge-first: zoom letter gaps, thin lines, and soft shadows before you drop the file into a client deck.
- Hard no’s: not SVG/vector output, not pixel-perfect matting guarantees, not “generate a new logo from text.”
Key Takeaways
- Try here: Logo Background Remover is live and tuned for brand marks with optional “which logo” notes.
- Auto-detect path: product FAQ—leave the prompt empty for a single clear mark; add a short note only when several logos share one frame.
- Fork from general cutout: general background remover is better for people/products; logo page is better when the hero is a mark.
- Transparency basics: PNG can store per-pixel alpha (opacity) so edges can be partially transparent rather than hard on/off—see the W3C PNG data representation notes on alpha and the modern PNG specification overview of alpha samples.
- Why designers ask for PNG: alpha-aware PNG is the common digital handoff for marks that must sit on many backgrounds; JPEG is a poor fit when you need true transparency (MDN: alpha channel; practical export guidance such as Adobe Express on transparent backgrounds).
- Credits (product fact): on-site FAQ—signup credits cover a default-tier run on this path; account required.
- Adjacent tools: image upscaler after a clean isolation, image text editor / add text to photo only when you are editing raster text in a scene—not as a substitute for vector brand files.
Logo cutout vs general background remove
| Intent | What you want | Right path on SupaImagine | Wrong path | | --- | --- | --- | --- | | Clean brand mark | Wordmark/icon on transparency | Logo background remover | General portrait cutout settings on tiny corner logos | | Person / product PNG | Subject cutout for ads | Background remover | Forcing logo auto-detect on a full lifestyle photo | | New logo concept | Invent a mark from text | Separate design / image tools | Pretending cutout tools “design” brands | | True vector master | Infinite scale paths | Illustrator/Figma source files | Claiming PNG isolation is SVG |
If your file is a screenshot of a site header with three logos, say which one to keep. If your file is a founder headshot, you are not in logo land—switch tools.
Pipeline (honest 5 stages)
Stage 0 — Pick the right source file
Before upload, choose the sharpest mark you own:
- Prefer a high-contrast export over a Instagram story screenshot.
- Avoid tiny corner watermarks as your only source.
- If the only file has compression blocks, plan a second pass or an upscale after isolation—not magic.
Product FAQ guidance: sharp, high-contrast logos on simple backdrops clean up best.
Stage 1 — Open the logo tool (not the portrait tool)
Open Logo Background Remover. The page is explicit:
- isolates wordmarks, icons, monograms, badges,
- auto-detects the primary mark when the prompt is empty,
- is not a logo generator.
That single routing choice prevents most failed cutouts.
Stage 2 — Upload, then decide: empty prompt or named mark
Path A — single clear logo
- Upload PNG/JPG/screenshot.
- Leave the prompt empty.
- Generate.
Path B — multiple marks in one frame
Add a short note, for example:
Keep only the blue monogram in the top-left. Remove the red partner logo and the photo background.Or:
Keep the black wordmark "AURORA" centered. Ignore icons in the footer.Stage 3 — Edge QA (the part people skip)
Zoom to 100–200% and inspect:
| Edge risk | What failure looks like | Fix | | --- | --- | --- | | Thin strokes | Hairline letters dissolve | Re-run with “keep thin strokes continuous”; start from a larger source | | Counters / holes | A, O, R, 8 fill in or blow out | Note “preserve letter counters / enclosed spaces” | | Halo | White/dark fringe on colored slides | Re-run; place on both light and dark test backgrounds | | Drop shadow | Soft gray matte remains | Ask to remove shadow or keep it intentionally for mockups | | Wrong object | Face or product kept instead of mark | Switch from general remover; name the logo explicitly |
Transparency is not binary. PNG alpha can store partial opacity along antialiased edges (W3C PNG alpha channel; PNG spec alpha samples). Soft fringes that look fine on a checkerboard can still glow on a saturated brand color—test both.
Stage 4 — Export and place like a designer, not like a meme
- Download the isolated mark.
- Drop it on white, black, and brand color rectangles.
- If you need more pixels for a large booth panel, run a keeper through image upscaler—but upscaling a broken matte only scales the matte error.
- Keep a vector master elsewhere when you have one; this path is raster isolation for speed.
Stage 5 — Know the product ceiling
From the on-site FAQ, set expectations before client delivery:
- You get a clean isolated mark aimed at transparent-style reuse.
- Pixel-perfect matting and true vector SVG are not guaranteed.
- Commercial use follows paid plans—confirm before campaigns.
- Signup credits cover a default-tier trial run with an account.
Copyable notes (when auto-detect is not enough)
Note 1 — wordmark on busy poster
Keep only the white wordmark centered in the frame. Preserve thin letter strokes and open counters. Remove the colorful poster background and any photos. No extra shapes.Note 2 — app icon on packaging photo
Keep only the orange hexagon app icon on the box front. Remove the cardboard, tape, and warehouse background. Clean hard edges, no shadow.Note 3 — monogram vs partner logo
Keep the navy monogram top-left. Remove the gray partner logo bottom-right and the UI screenshot chrome.Run each note only when the frame is crowded. Empty prompt is still the default for clean single marks.
What we know vs what we don’t
What we know
- SupaImagine ships a dedicated logo background remover separate from the general background remover.
- Product path: upload → auto-detect or short note → edge check → download.
- PNG is the everyday digital format people use when they need alpha transparency for marks (W3C PNG, MDN alpha).
- JPEG is the wrong handoff when the deliverable must be see-through on arbitrary backgrounds (Adobe Express transparent background notes).
- libpng’s classic docs describe alpha as opacity (0 = fully transparent) for PNG workflows (PNG Basics / alpha).
What we don’t know (or must qualify)
- Whether a given raster will match your brand manual’s exact Pantone or vector geometry.
- Whether thin script fonts will survive without a second pass.
- Whether every downstream app will preserve alpha (some “export for web” paths flatten—re-open the file and check).
- Legal right to use a mark you do not own—cutout tools do not grant trademark rights.
How to evaluate on SupaImagine (3 steps)
- Open Logo Background Remover and upload one sharp logo on a simple backdrop; leave the prompt empty.
- Score edges: strokes continuous (Y/N), counters open (Y/N), halo on dark slide (Y/N), wrong object kept (Y/N).
- Stress test the download on white/black/brand color. Only then upscale or place in decks.
Checklist card
[ ] Source is a logo/mark (not a lifestyle hero)
[ ] Used logo tool, not only general remover
[ ] Prompt empty OR named which mark to keep
[ ] Zoomed thin strokes and counters
[ ] Tested on light and dark backgrounds
[ ] No claim of SVG/vector master
[ ] Rights: we own or may use this mark
[ ] Plan/credits confirmed for commercial use
FAQ
What is a logo background remover for here?
It isolates a brand mark—wordmark, icon, monogram, or badge—and clears the surrounding backdrop for mockups, decks, and ads (product page).
Do I have to write a prompt?
No. Leave it empty for a single clear mark. Add a note only when several logos share one frame (product FAQ).
How is this different from the general AI background remover?
Logo page is tuned for marks and optional “which logo” control. General background remover is the better path for people, products, and everyday photos.
Will I get a perfect transparent PNG every time?
You get a clean isolated mark for transparent-style reuse. Always check thin strokes and letter gaps. Pixel-perfect matting and SVG are not guaranteed (product FAQ).
Can I try it free after signup?
Yes—signup credits cover a default-tier run; you need an account (product FAQ).
What should I upload for the cleanest result?
A sharp, high-contrast logo on a simple backdrop. Avoid tiny corner watermarks and heavy compression when you can.
Does this generate a new logo from text?
No. Upload an existing mark. This tool removes the logo background; it is not a logo generator.
Why do people insist on PNG for logos?
Because PNG can carry an alpha channel so the mark composites cleanly on different backgrounds (W3C, MDN alpha). Flattening to JPEG usually introduces an opaque matte.
Can I use the cutout commercially?
Commercial use is described as available on paid plans on the product page—confirm your plan before client or paid campaigns.
When should I upscale?
Only after the isolation looks clean. Upscale a bad matte and you still have a bad matte—use image upscaler on keepers.
What if I only need a person cutout for an ad?
Use background remover. Do not force the logo tool to treat a face as a monogram.
About Theo Nakamura
Theo Nakamura is a Prompt Engineering Writer on SupaImagine. He turns messy prompt experiments into repeatable workflows and writes the hands-on guides on the site—so builders ship fewer unusable drafts.